

Workspace Work Item Types Enterprise Grid
On the Enterprise Grid, work item types are defined at the workspace level by Workspace Admins and imported into projects.
This ensures consistency — a "Bug" in one project has the same properties and structure as a "Bug" in another — while keeping centralized governance over how work is tracked across your organization.
INFO
On Pro and Business plans, work item types are managed at the project level. See Project Work Item Types.
How workspace work item types work
Every workspace starts with a default type called Task. This is the base type for all work items and cannot be deleted. You can add custom properties to it, but it's always available as a fallback.
When you create additional types at the workspace level, they don't automatically appear in projects. Project Admins import the types they need from the workspace library, making only the relevant types available in their project. This keeps projects focused while maintaining centralized governance.
The type assigned to a work item determines its available properties and its behavior across workflows. Changes made to a type at the workspace level reflect across all projects using that type — there's no duplication.
TIP
If you had work item types configured at the project level before upgrading to the Enterprise Grid, they've been rolled up to the workspace level. Project Admins can no longer create or edit types directly — that's now handled by Workspace Admins. Your existing types and properties are preserved and available in the workspace library.
Activate workspace work item types
WARNING
Work item types cannot be disabled once enabled for a workspace.
Role: Workspace Admin
- Go to Workspace Settings > Work item Types.
- Toggle on Turn on Work item types for this workspace.
Once enabled, you'll see the Work item Types and Properties tabs. The default Task type is already listed.
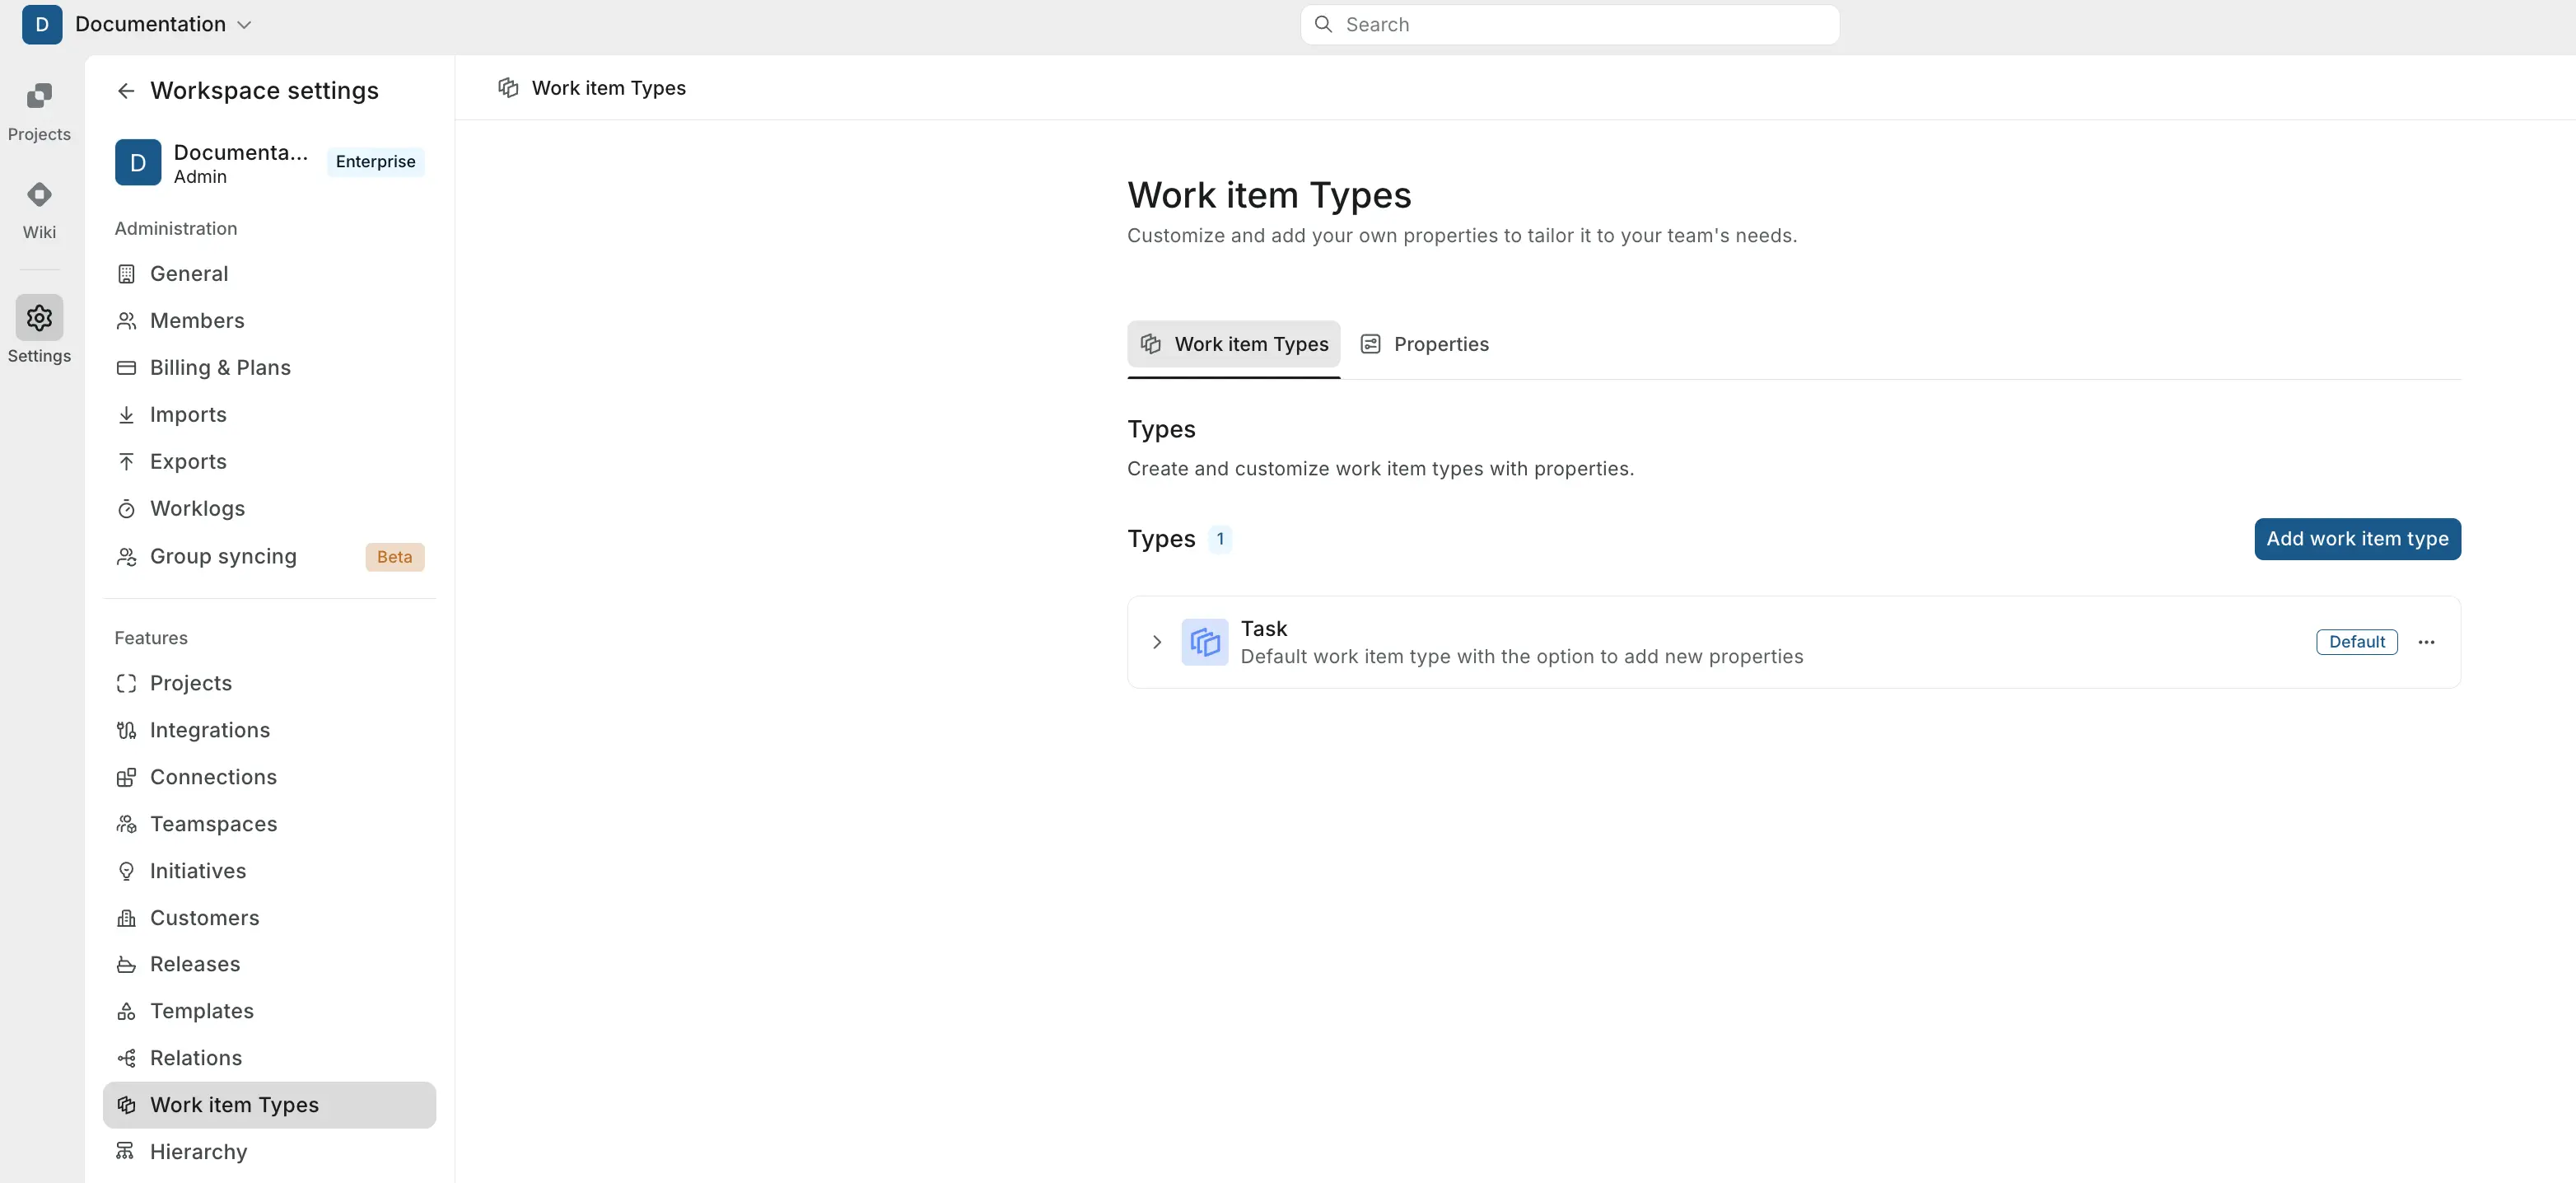
Create workspace work item type
Role: Workspace Admin
- On the Work item Types tab, click Add work item type.
- In the modal, enter a unique name and a description that explains what this type is for and when to use it.
- Click the icon to the left of the name to choose a custom icon and color.
- Click Add work item type.
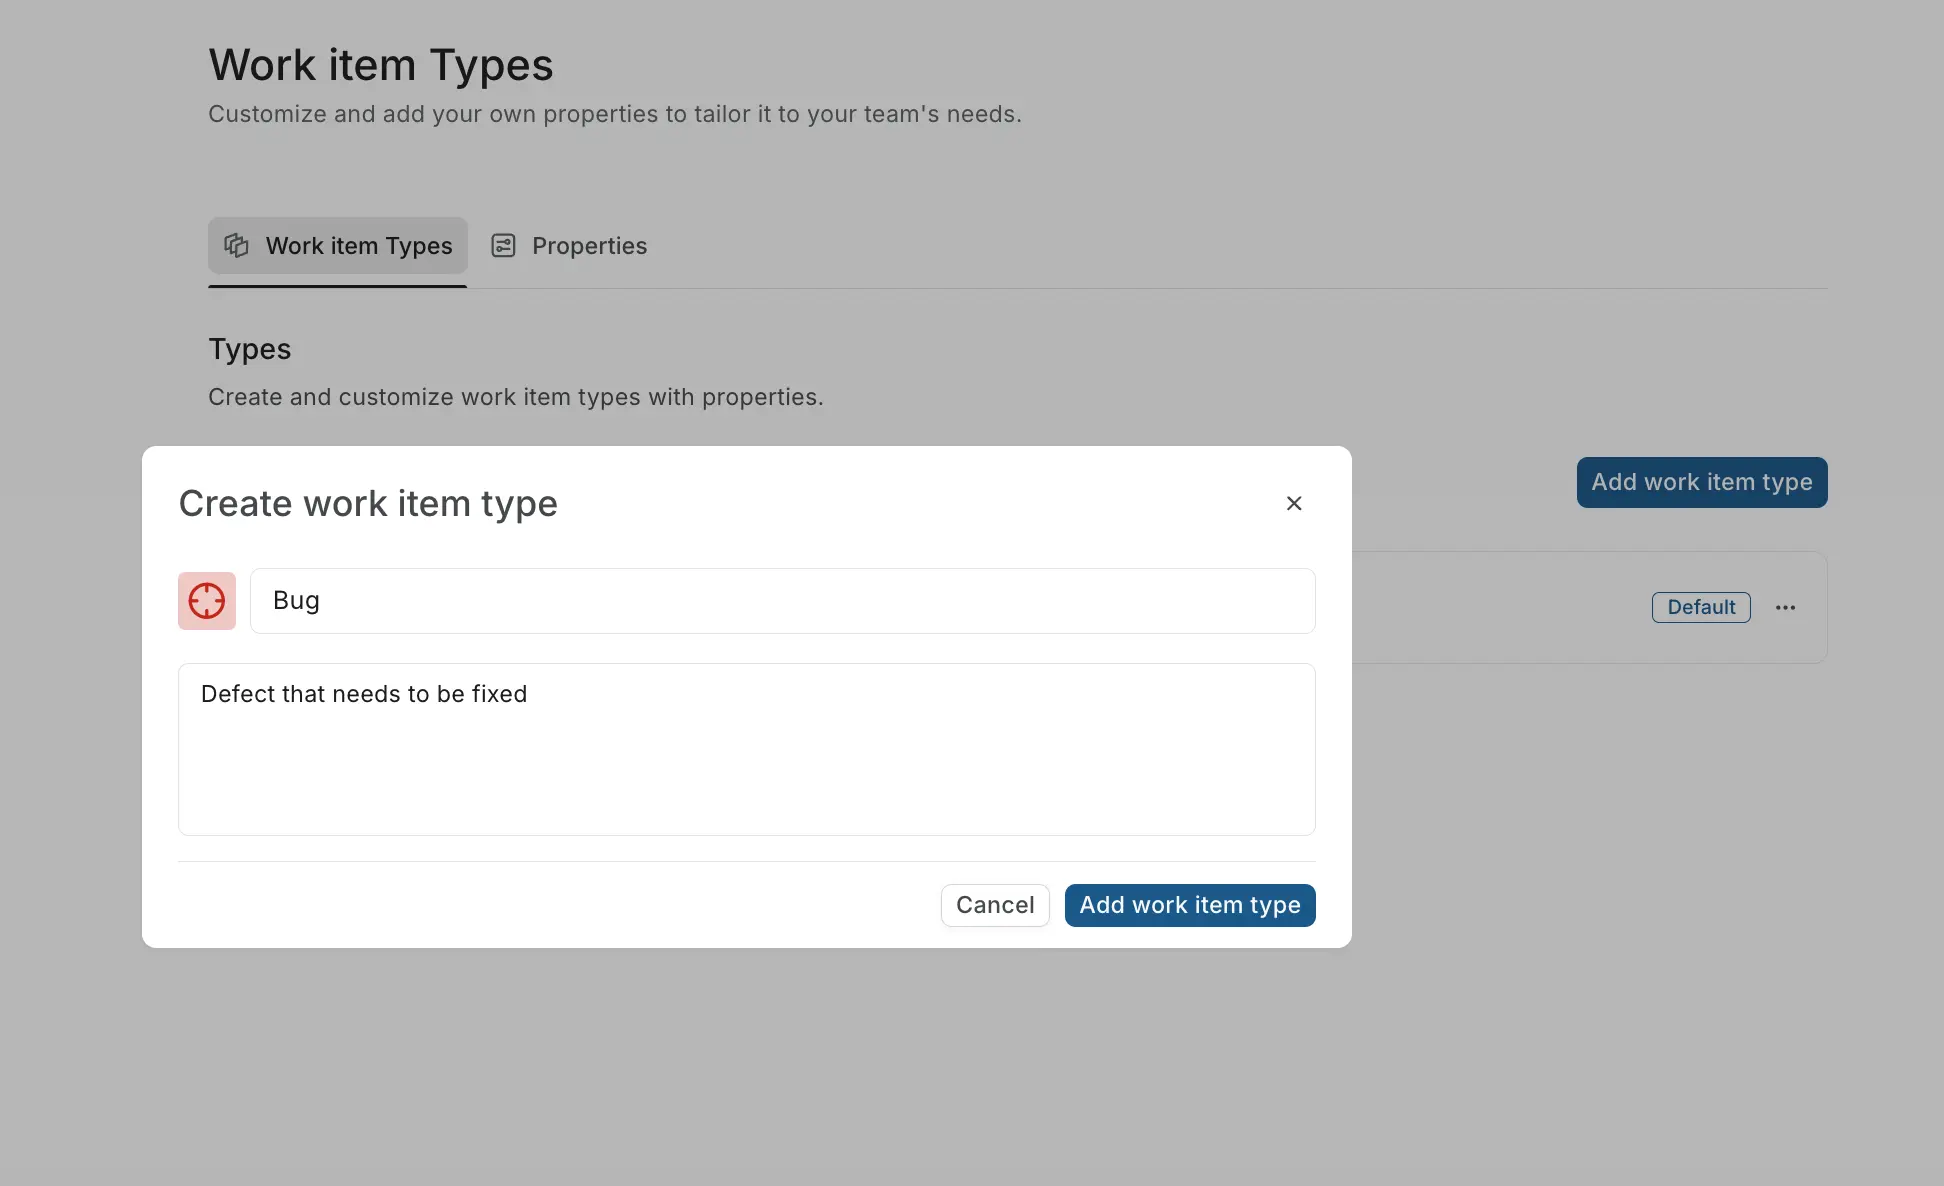
The new type appears in the list. Use the toggle next to it to control whether project members can select it when creating work items.
The type name must be unique across the workspace. A newly created type starts inactive until you turn it on with the toggle.
How a type reaches projects
Creating a type at the workspace level makes it available in the workspace library, but it does not put the type into every project by itself. How a type reaches a project depends on its rollout setting:
| Rollout | Behavior |
|---|---|
| Import (default) | The type is added to a project only when a Project Admin imports it from the workspace library. See Import types into a project. |
| Mandatory | The type is present in every project and cannot be removed by a Project Admin. Marking a type Mandatory adds it to all existing projects immediately. |
WARNING
Marking a type Mandatory adds it to every project right away, and a mandatory type cannot be deactivated or removed at the project level. Changing it back to Import later does not remove it from projects that already have it.
The default Task type behaves like a workspace-wide type: it is present in every project and cannot be deleted or made inactive.
Create workspace custom properties
Role: Workspace Admin
Custom properties are fields you define at the workspace level and attach to one or more work item types. A property like "Severity" can be used across both "Bug" and "Incident" types without duplicating it. Properties are not automatically applied to all types — you explicitly choose which properties belong to which type.
Create a property
- Switch to the Properties tab.
- Click Add new property.
- Fill in the Title and Description.
- Select a Property type from the dropdown.
- Check Mandatory property if this field should be required when creating a work item of the linked type.
- Click Create.
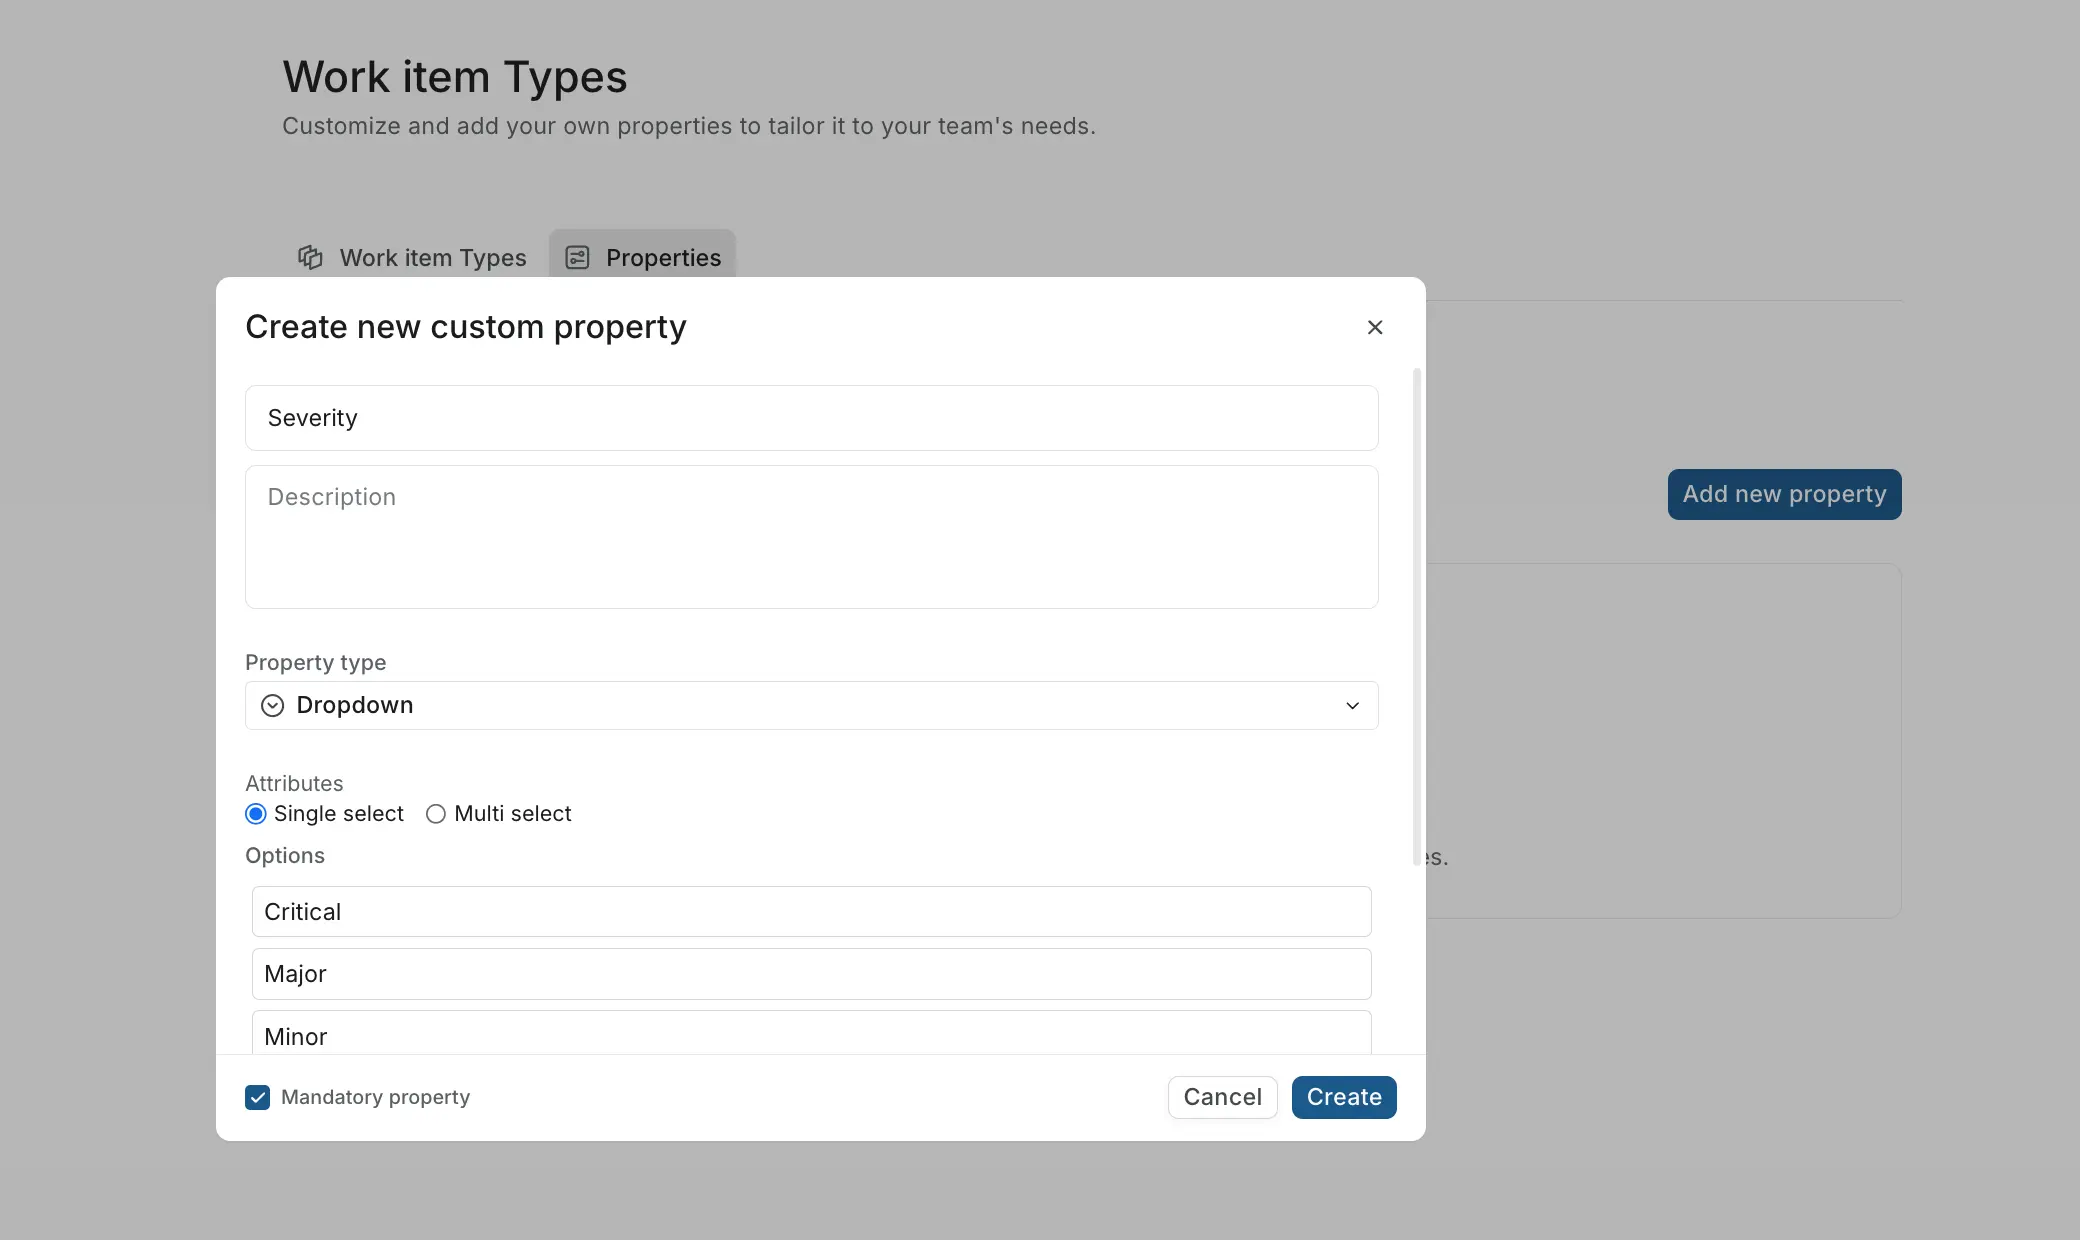
The property is now available to attach to any work item type.
Attach properties to a type
- Switch to the Work item Types tab.
- Expand the type you want to add properties to by clicking its arrow.
- Click + Add properties.
- In the modal, select the properties you want to attach and click Add.
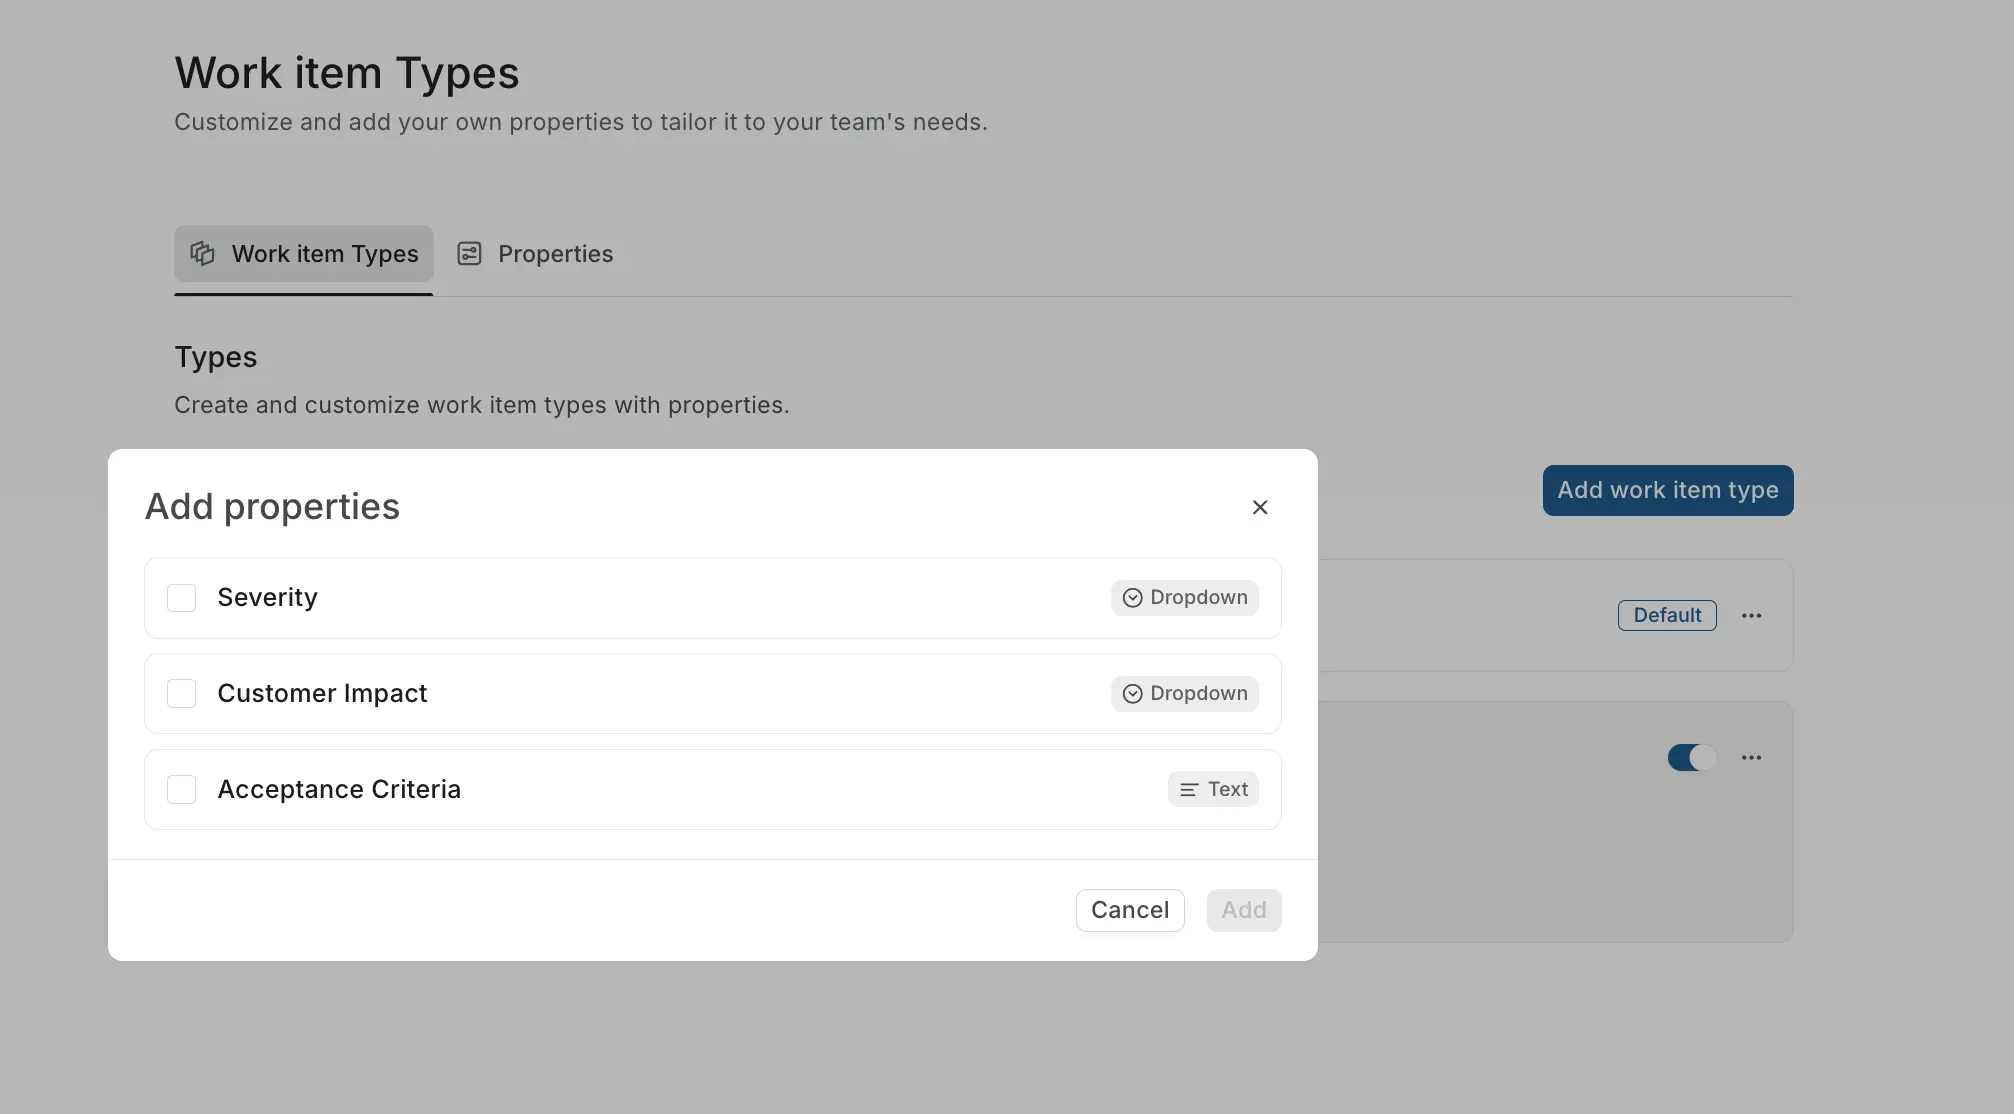
If the modal shows "No properties available," either all existing properties are already linked to that type, or no custom properties have been created at the workspace level yet. Create new properties from the Properties tab first.
Property settings
Every property, regardless of its type, shares a common set of settings.
Title (required) The label members see on the work item. It must be unique within the type, and cannot reuse one of the reserved field names state, due date, cycle, or modules. Plane derives an internal name from the title automatically, which is what formulas and the API use to reference the field.
Description Optional helper text explaining what the property is for.
Icon An icon shown next to the property. Each property type has a sensible default.
Mandatory When on, the value cannot be left empty and the work item cannot be created or saved without it. Marking a property mandatory clears any default value. Boolean, Formula, and read-only Text properties cannot be made mandatory.
Active Properties are active by default. Turn a property off to hide it without deleting it, and without losing values already entered on existing work items.
Default value A value pre-filled on new work items. Most property types support a default; Formula properties do not, and a mandatory property cannot carry a default.
Single or multi select For Dropdown, Member picker, and Release picker properties, whether members can select one value or several.
Display order New properties are added to the end of the type and can be reordered. The order set here is the order members see on the work item.
Several of these settings can be overridden per context, so the same property can be mandatory in one project or type and optional in another. See Scope properties with contexts.
Property types
Text
A freeform text field. When you add a text property, you choose one of three formats:
- Single line: A compact input for short values like names, codes, or labels.
- Paragraph: A multi-line input for longer freeform content.
- Read-only: A fixed text display. You enter the text when setting up the property, and members see it on every work item but cannot edit it. Read-only text properties cannot be marked as mandatory.
The format is chosen when the property is created and cannot be changed afterward.
Number
A numeric field that accepts decimal values. You can optionally set a default value that pre-fills when a work item is created.
Dropdown
A selection field backed by a list of options you define. When setting up the property, add your options under Add options. Each option can have a name and an icon, and options can be nested under a parent option. At least one option is required.
Choose Single select to let members pick one option at a time, or Multi select to allow multiple selections. You can mark one or more options as the default (a single-select property can have only one default, and a mandatory property cannot carry a default).
Boolean
A true/false toggle. The default state is false. Because it already represents a complete two-state answer, boolean properties cannot be marked as mandatory.
Date
A date picker field. You choose a display format for dates across this property:
Jan 15, 202515/01/202501/15/20252025/01/15
The format you pick applies consistently to all work items using this property, and can be changed at any time.
Member picker
A people-selection field that lists the members of the workspace. Choose Single select to allow one member, or Multi select to allow several.
Members selected through a member picker property are automatically added as subscribers to that work item, so they receive notifications for updates, comments, and status changes.
Release picker Business
A field for linking a work item to one or more releases in the project. Supports multi-select.
Rich text Business
A full document editor field. Unlike a plain text property, rich text supports formatting: headings, lists, code blocks, inline code, bold, italic, and embedded images. Each work item stores its own content for the field, and that content is versioned and searchable. Content is sanitized on save, so scripts and unsafe HTML are removed. Rich text properties cannot be used to filter or group work items.
URL
A field for a single URL. Members enter a link to an external resource, like a design file, a document, or a ticket in another tool, and it renders as a clickable link on the work item.
Formula Enterprise Grid
A computed, read-only field. You write an expression when setting up the property, and Plane evaluates it automatically for each work item. Members cannot edit the value directly; it always reflects the formula result.
Referencing fields. Reference another property with double curly braces: \{\{field_name\}\}. Field names are matched case-insensitively and ignore spaces versus underscores, so \{\{start_date\}\}, \{\{Start Date\}\}, and \{\{START_DATE\}\} all resolve to the same field. A formula can reference Text, Number, Date, and Boolean properties on the same work item type, and cannot reference itself.
Result types. A formula evaluates to a Number, Text, Date, or Boolean.
Operators.
- Arithmetic on numbers:
+ - * / - Dates:
\{\{end\}\} - \{\{start\}\}gives the number of days;\{\{date\}\} + 30and\{\{date\}\} - 7shift a date. - Text concatenation:
&(numbers, dates, and booleans are converted to text automatically). - Comparisons:
= != < <= > >=(these return a Boolean).
Functions. IF(condition, true_value, false_value), ROUND, ABS, UPPER, LOWER, LEN, CONCAT, TODAY(), NOW().
Examples.
Categorize by estimate size:
IF(\{\{estimate_point\}\} > 5, "Large", "Small")Flag high-priority items:
IF(\{\{priority\}\} = "HIGH", "Urgent: " & \{\{name\}\}, \{\{name\}\})Days remaining until a deadline:
IF((\{\{due_date\}\} - TODAY()) < 0, "OVERDUE", (\{\{due_date\}\} - TODAY()) & " days remaining")Behavior. If any referenced value is empty, the result is empty (an IF() branch that is not taken can still reference an empty field safely). A runtime error, such as dividing by zero, shows an error state rather than a value. Because the value is always derived, formula properties cannot be marked as mandatory.
Scope properties with contexts
By default, a property applies everywhere it is attached. Contexts let you narrow a property to specific projects and work item types, each with its own configuration, so the same property can behave differently depending on where it is used.
When you first create a property, Plane creates a default context covering all projects and all types, so the property is visible everywhere it's attached. You then add more specific contexts as needed.
With contexts you can, for example, make a "Severity" dropdown mandatory on the Bug type in one project but optional on the same type in another. For any work item, Plane resolves the effective setting from the most specific matching context, falling back to the property's own base setting when no context matches.
Manage these from the property's Manage contexts option on the Properties tab.
Edit and delete a property
Edit a property
Role: Workspace Admin
You can change a property's title, description, icon, mandatory state, active state, and default value at any time.
Some changes lock once values exist
Once any work item has a value for the property, you cannot change its property type, its single/multi-select setting, or its type-specific settings (such as a dropdown's options). Those are only editable while no work item has used the property yet. Attempting to change them afterward is rejected.
Making a property mandatory later is allowed (except for the types that can't be mandatory). Existing work items that are missing the value will need it filled in the next time they are edited.
Delete a property
Role: Workspace Admin
Deleting a property that already has values gives you a choice:
- Save values to work item descriptions (recommended) — each affected work item keeps its value by appending it to the work item's description, with an activity entry recording the change, before the property is removed.
- Delete the property and all its values — removes the values along with the definition. This cannot be undone.
The delete dialog shows how many work items, work item types, and projects across the workspace are affected. If you only want to stop using a property temporarily, turn it inactive instead of deleting it.
Import types into a project
Role: Project Admin
Projects don't create their own types — they import what's defined at the workspace level. Imported types are linked to the workspace definition, so updates made by Workspace Admins are reflected automatically.
- Go to Project Settings > Work item Types.
- Click Import from workspace.
- In the modal, select the types you want to bring into this project from the workspace library.
- Click Add.
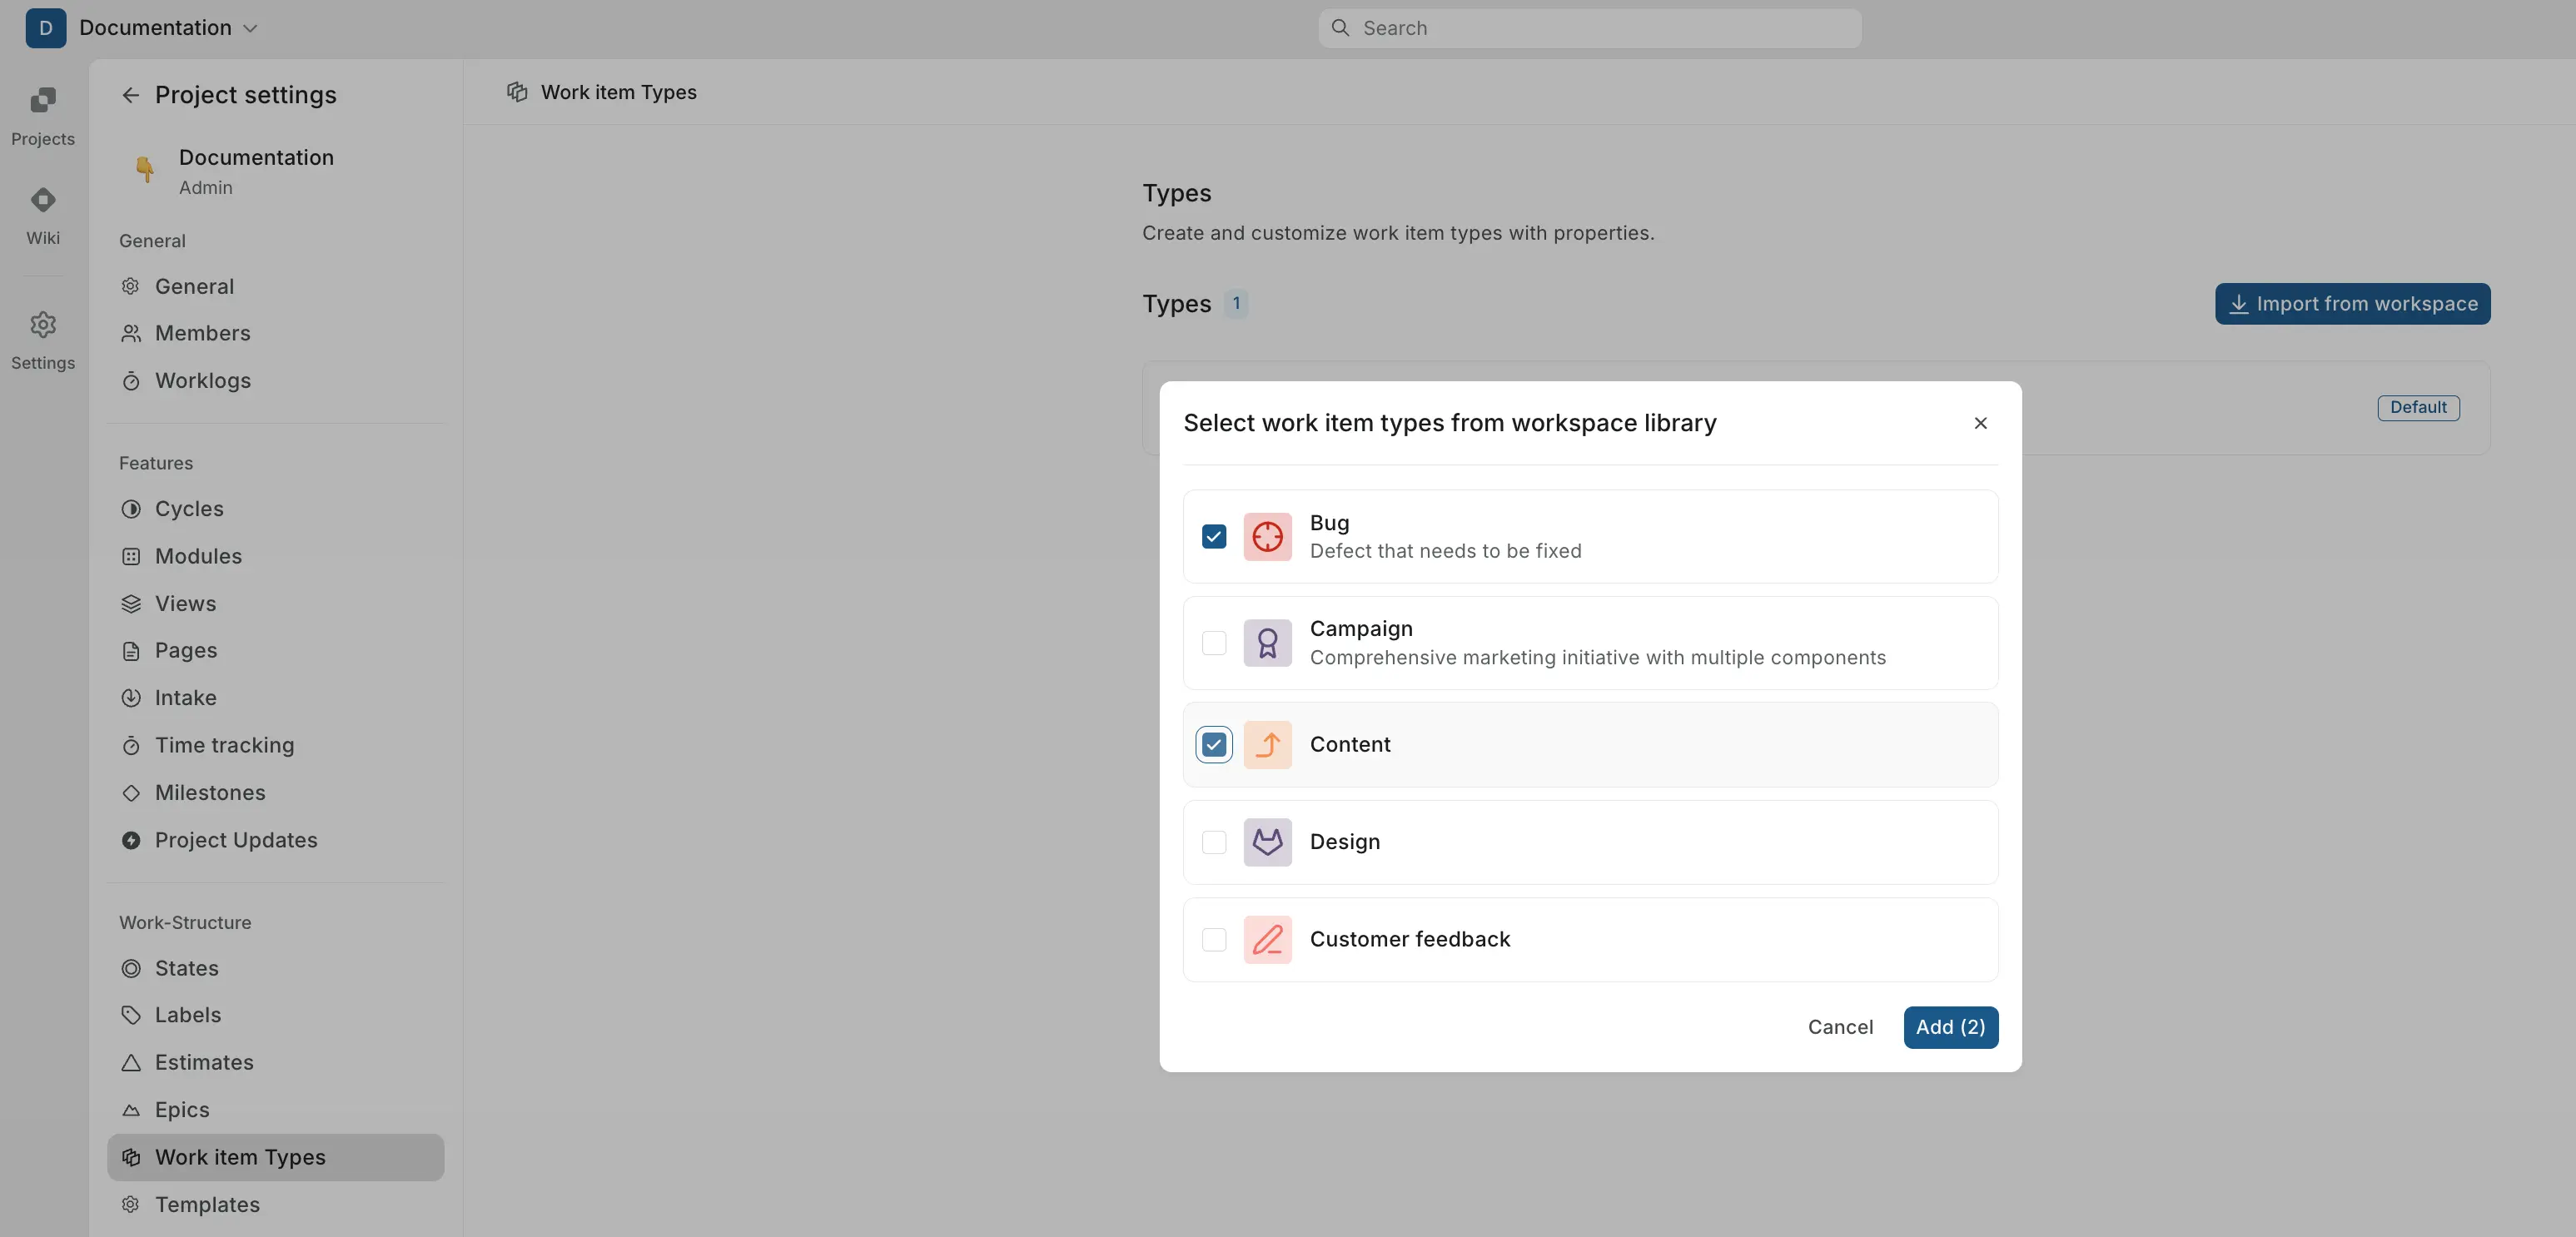
The imported types now appear in the project's type list alongside the default Task type. Project members can select them when creating work items.
Only types that have been imported into a project are available when creating or editing work items in that project.
Use workspace work item types
Once types are available in a project, any project member can use them.
When creating a new work item, select the type from the dropdown at the top-left of the create modal. The modal updates to show the properties associated with that type. Any mandatory properties must be filled before the work item can be created.
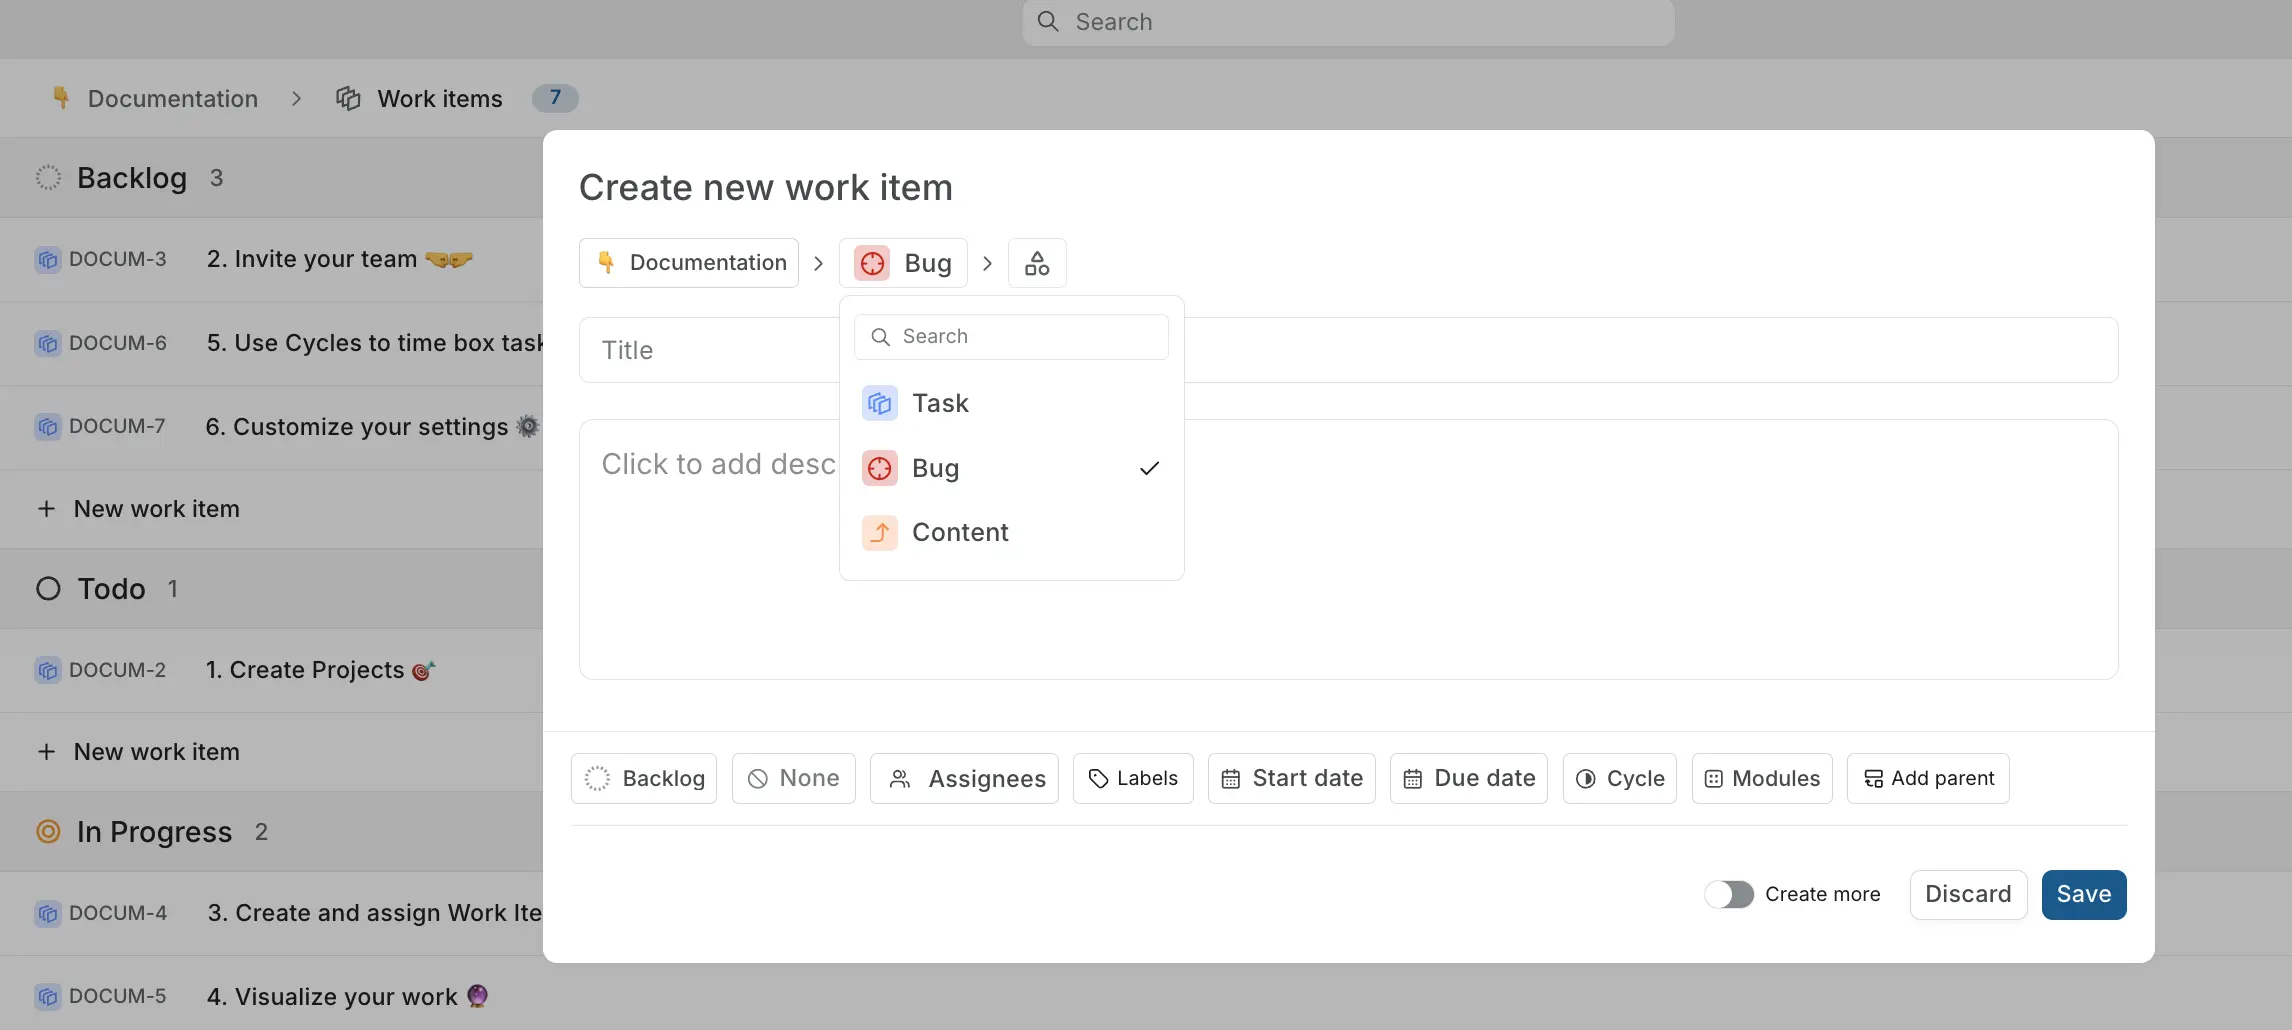
When viewing work items, the type is displayed with its icon next to the work item title. Custom properties appear in the properties panel, and changes to property values are tracked in the work item's activity trail.
Switch a work item's type
- Open the work item.
- Hover to the right of the work item ID and click Switch work item type. Alternatively, click Edit from the work item's three-dot menu.
- Choose the new type from the dropdown.
- Click Update.
Bulk update types
- Switch to the Spreadsheet layout on the Work items page.
- Select the work items you want to update.
- Open the Work item type dropdown at the bottom of the screen and pick the new type.
- Click Update.
Disable a workspace work item type
Role: Workspace Admin
You can temporarily prevent new work items from being created with a specific type without affecting existing ones. On the Work item Types tab, toggle off the switch next to the type you want to disable.
Existing work items of that type are unaffected — they retain their type and properties. The type simply won't appear as an option when creating new work items.
Delete a workspace work item type
Role: Workspace Admin
Deleting a type removes it from the workspace library and from every project that imported it. Existing work items of that type will need to be reassigned to another type.
Before deleting, consider whether disabling the type would be a better option — it preserves existing work items while preventing new ones from being created.
Hierarchy
Hierarchy lets you define structured parent-child relationships between work item types at the workspace level.
Once configured, it controls which types can be nested under which — ensuring that work is organized consistently across every project in the workspace.
Without hierarchy, any work item can be a sub-work item of any other, regardless of type. With hierarchy enabled, Plane enforces the rules you define: an Epic can only contain Stories and Tasks, a Campaign can only contain Deliverables, and so on. Invalid nesting is blocked throughout the product.
Why use hierarchy
Hierarchy is useful when your organization has a clear structure for how work breaks down and you want to enforce it consistently. It prevents ad hoc nesting that doesn't match your process, keeps reporting and rollups meaningful, and makes it clear to everyone on the team what "level" of work they're looking at.
How hierarchy levels work
Hierarchy is organized as numbered levels, where higher numbers represent broader work and lower numbers represent more granular tasks. Each level can contain one or more work item types, and each level defines a parent relationship with the level directly above it and a child relationship with the level directly below it.
Level 0 is the default — types that sit here are leaf-level work items with no children defined in the hierarchy. Types not assigned to any level remain at Level 0.
For example, a product engineering team might define:
| Level | Types | Role in the hierarchy |
|---|---|---|
| 2 | Epic | Major feature or deliverable |
| 1 | Story, Bug | Individual units of work |
| 0 | Task, Spike | Leaf-level execution items |
In this setup, an Epic can contain Stories and Bugs, and a Story can contain Tasks and Spikes. But a Task cannot contain an Epic — the hierarchy enforces the defined structure.
Activate hierarchy
WARNING
Hierarchy cannot be disabled once enabled for a workspace.
Role: Workspace Admin
Hierarchy requires work item types to be activated and defined first.
Once enabled, you'll see all your work item types listed at Level 0 (Default), with a drop zone above for building levels.
Configure hierarchy levels
- Drag and drop a type from Level 0 up into a new level to create the hierarchy. Each type you drag creates or joins a level.
- Levels are numbered automatically — higher numbers sit at the top of the hierarchy.
- Multiple types can sit at the same level. For example, Bug and Customer feedback can both be Level 2 types, meaning both can serve as parents to Level 1 types.
- Use the … menu on a level to set it as default.
- Click Save changes when you're done. Click Discard to revert unsaved changes.
The hierarchy builder shows the parent→child flow with arrow connectors between levels, making it easy to visualize the structure.
What hierarchy enforces
Once hierarchy is enabled and configured, the following rules are enforced across the workspace:
Work item creation. When creating a new work item, the type dropdown reflects hierarchy rules.
Sub-work item creation. When adding a sub-work item to a parent, only types from the level directly below the parent's level are shown. Disallowed types are automatically hidden from the picker.
Type changes. If a work item already has parent or child relationships, changing its type is only allowed if the new type is valid within the existing hierarchy. If the change would create an invalid relationship, it's blocked.
Data integrity. Hierarchy prevents invalid parent-child mappings from being created through any surface — the UI, bulk operations, or imports. Existing relationships that were created before hierarchy was enabled remain intact, but new invalid relationships cannot be added.